[Use Kameleoon] Take your experimentation strategy to the next level with our REST APIs
A WYSIWYG editor is a great way to get started with experimentation when you don’t have a deep technical knowledge. But, as your experiments get more sophisticated, you will start to create tests, which are not only done by using a visual editor, but also coded by front-end developers who will use our JavaScript and CSS code injection features. Developers can however quickly get frustrated as this way of working will not fully follow their development day to day processes. Indeed, developers usually write code within an IDE (Integrated developer environment) and are not used to manipulating a visual editor in order to push code to a webpage. The good news is that, with Kameleoon, developers can work with our solution without having to change their daily “routine” and without even having to connect to our visual interface. Developers can now come as they are :-). Indeed, for every feature in our interface, we have a corresponding REST API which can be used to fully manage your experiments programmatically. When used with a Version Control System such as git, it allows for much finer-grained control over your experiments. In this article, we’ll explain how some of our customers are using our REST APIs with GitHub to scale their experimentation strategy.
 When working within this folder, this is automatically versioned as a git repository, since it was originally checked out from github. You can clone it and set your own foreign url to make changes to it.
  After creating a test, there are new files ready to be commited.
  With git it is possible to have a granular version system of your a/b test configuration
 The grunt script can be used to create, list and update a test, with the simulate task it’s possible to create a simulation link so that you can test everything live on your website using the simulation panel. As you can see, the package is still being developed but it gives you an idea and a boilerplate to start your own test setup with a version history. Keep a look at the repository, it will be updated in the future with more functions, the not finished ones will be completed.
 Our platform was designed to be used by all types of users, whether they're marketers or developers. With these Rest APIs, Kameleoon provides developers with an easier way to work!
NB. You can access directly our Developer Documentation about Rest APIs here .
How to link Kameleoon and GitHub to create and deploy your tests
You can fully make use of the Kameleoon tool by using our REST API to create, update and deploy experiments. You can then set up a test environment by yourself with the use of the API endpoints which are available. To facilitate the interactions, create tests and keep a version history we highly recommend you to make use of a local test suite. To help you get through it, we’ve built a repository with some examples, that you can access here on Github. The example package is licensed under the MIT Open Source license, so feel free to add more features, do pull requests of your added features or to customize it for your needs and your test setup. The template folder “template/ab-000” will act as a boilerplate template, which will be used as a blueprint to create your experiments. You will then find a folder named “tests”. When creating a new experiment, everything which is being updated, will be in this folder: variants, CSS and JS per variant or global to a test, etc. When working within this folder, this is automatically versioned as a git repository, since it was originally checked out from github. You can clone it and set your own foreign url to make changes to it. After creating a test, there are new files ready to be commited. With git it is possible to have a granular version system of your a/b test configuration
How to make use of the package?
You will need to add your Kameleoon credentials within the kameleoon-configuration.json file first. To help you get started using REST API functions, we’ve built a library of some useful grunt tasks which you can find at the root of the repository in the Gruntfile.js file. Some of them will make use of the Kameleoon REST API endpoints. · grunt: default task will print some fancy ascii art, provided by Henry Münster from Die Welt who has been our first customer using our REST API to push experiments live on their websites - also thanks for inspiration and ideas! · grunt authentication: create the authentication token, which is valid for 1 hour. If you repeat within that time frame, no new token should be created. The token will be saved into kameleoon-configuration automatically and used in the single tasks from there · grunt listSites: get all sites, which are configured in the account · grunt setSite: set a site for the current working setup, this will be saved into kameleoon-configuration automatically and used in the tasks to update and deploy to the chosen site · grunt listTests: list all tests within a site, after setting the site before · grunt createLocalTest: this function will create a new test from a template, which is in the folder /template/. Option --name is mandatory, the name will be used to set up a new folder under the /template/ folder. After setting up the test, one should set the URL and name for it within the configuration.json in the test folder · grunt deleteLocalTest: delete a local test, provide --name as param · grunt listLocalTests: this function will show all locally created tests (not the one that are within the account) · grunt scrapeLocalTest: the URL provided in the configuration.json will be used to scrape the page, this will be saved under the /target/ folder, the name will match the testname again · grunt previewLocalTest: start local server, with content from scrapeLocalTest · grunt deployTest: this method will deploy a locally created test to the kameleoon back-office. Within the task the method updateVariations will be called to set the css and js files from the local test · grunt listGoals: get a list of all goals associated to the selected site. grunt setSite must be called at least one time beforehand. · grunt assignGoal: provide a param --name and at least one param --goal · grunt deleteTest: delete a remote test, provide --id as param · grunt updateTest: update an already deployed test, use --name=ab-xxx in order to choose which test should be updated · grunt simulation: create a simulation link in order to see the test in the production system with a simulation panel – provide the param --name=ab-123 · grunt experimentResults: to get some basic stats about your test · grunt startTest: to start a test The grunt script can be used to create, list and update a test, with the simulate task it’s possible to create a simulation link so that you can test everything live on your website using the simulation panel. As you can see, the package is still being developed but it gives you an idea and a boilerplate to start your own test setup with a version history. Keep a look at the repository, it will be updated in the future with more functions, the not finished ones will be completed.
Example: How to create a new test and push code from GitHub to a variation within a test
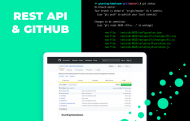
Let’s say you want to push code from your computer to your Kameleoon account. Here how you would do it using our repository: 1. Clone the repo from https://github.com/pixelschrubber/grunting-kameleoon 2. Edit the kameleoon-configuration.json with your account details 3. Call "npm install" in your shell to get all of the dependencies 4. Call "grunt authentication" in your shell in order to get an authentication token 5. Call "grunt listSites" to get an overview over your sites within the account 6. Call "grunt setSite --site=19046" with a sitecode gotten from the task before, to set a site in your local working environment 7. Call "grunt createLocalTest --name=ab-123" in order to create your first local test 8. Edit configuration.json in the freshly created test folder in tests/ab-123, provide the fields url and name 9. Put your variations in variation.css and variation.js in the test folder tests/ab-123/variation-0/ 10. Call "grunt deployTest --name=ab-123" to push your test to kameleoon with all CSS and JS code written in the corresponding files. 11. Call "grunt simulation --name=ab-123" to receive a simulation URL for your test, use the simulation panel to test your changes 12. When you need to update the code, make use of "grunt updateTest --name=ab-123" after you altered your local files As in the screenshot shown above, the backoffice will show the freshly created and deployed test: Our platform was designed to be used by all types of users, whether they're marketers or developers. With these Rest APIs, Kameleoon provides developers with an easier way to work!
If you'd like to know more, please visit our Developer Documentation on the topic.
Topics covered by this article
Full-stack
You may also enjoy these articles


