
Kameleoon’s simulation mode: ready, set, test…!
Before launching any new element on your website that that will be seen, used or clicked on by thousands of visitors, it goes without saying that you’ll want to ensure it works properly - regardless of your visitors’ digital footprint (type of device, IP address, screen resolution, operating system, browser).
Of course, the same applies to the personalizations and A/B tests you put in place on your website. Acceptance testing is the pre-production stage when you ensure that everything is working properly before the project is visible to visitors. Kameleoon provides you with a simulation mode to easily, efficiently and rigorously acceptance-test your A/B tests.
Simulation mode is a key feature for setting up A/B tests and an indispensable part of a personalization orchestration strategy. It enables you to completely pre-visualize and acceptance-test your scenario (graphics, targeting, storyboarding, capping and KPI), in real conditions before launch.
Simulating a test or personalization campaign before pushing it live is the only way to ensure that everything works as planned and that you are offering your visitors a controlled experience. With Kameleoon, you can pre-visualize and simulate an entire personalization campaign in just a few minutes.
1. Why use the simulation mode?
With the simulation mode, you can:
- Get an overview of all your ongoing experiments and simulate several experiments at the same time (and on multiple pages simultaneously) to identify scenarios that are potentially in conflict (for example, segments that intersect with each other). In this type of situation, simulation is an excellent tool to help you prioritize.
- Test your experiences in real conditions without launching, allowing you to visualize all the effects of an experiment (A/B test or personalization) on your visitor journeys. This means you can put yourself in your visitors’ shoes, with exactly the same conditions, to check that the experience they will receive is really what you had imagined.
- Confirm that a scenario works properly from a graphical point of view and that your targeting and goals are correctly configured. This way, you can quickly identify and correct potential errors before putting the experience online.
"With the simulation mode, we save a considerable amount of time and the risk of error is now nonexistent. We can launch our personalizations and our tests with confidence."
Alexandre Da Costa, Web Analytics Manager, Auchan
2. A step-by-step guide
How do you launch the simulation mode?
Practical, intuitive and easy to use, it takes the form of a perfectly optimized and responsive panel, which appears at the bottom of the page, just above the fold.
This window can be easily hidden or closed and follows you throughout your navigation. You can access it by clicking on:
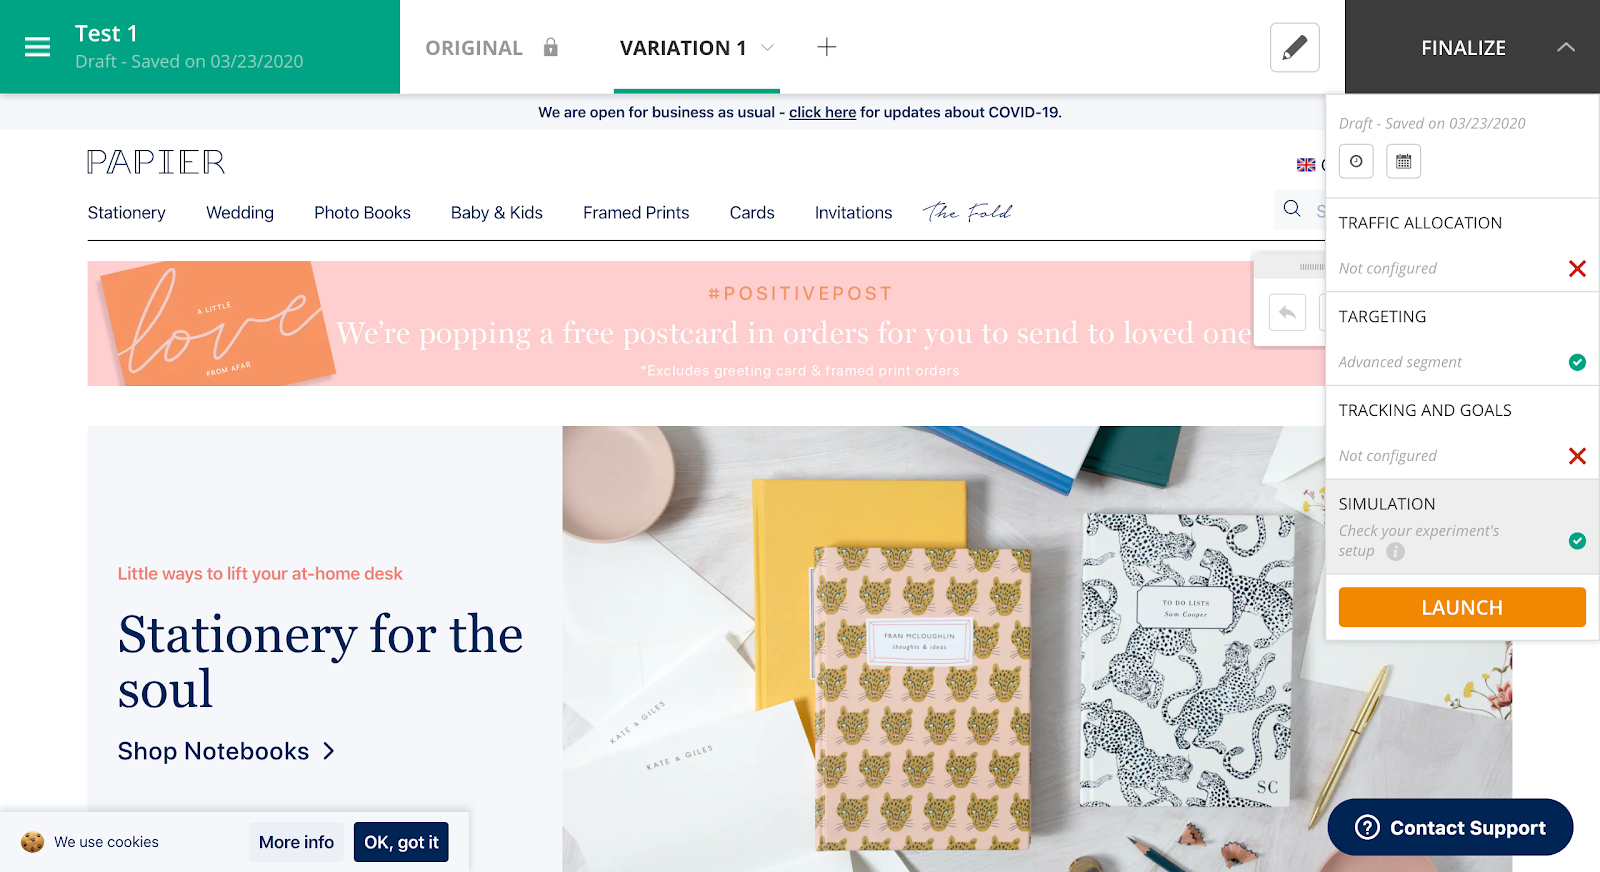
- In the “finalize” block, last step, if you are in the edit mode:
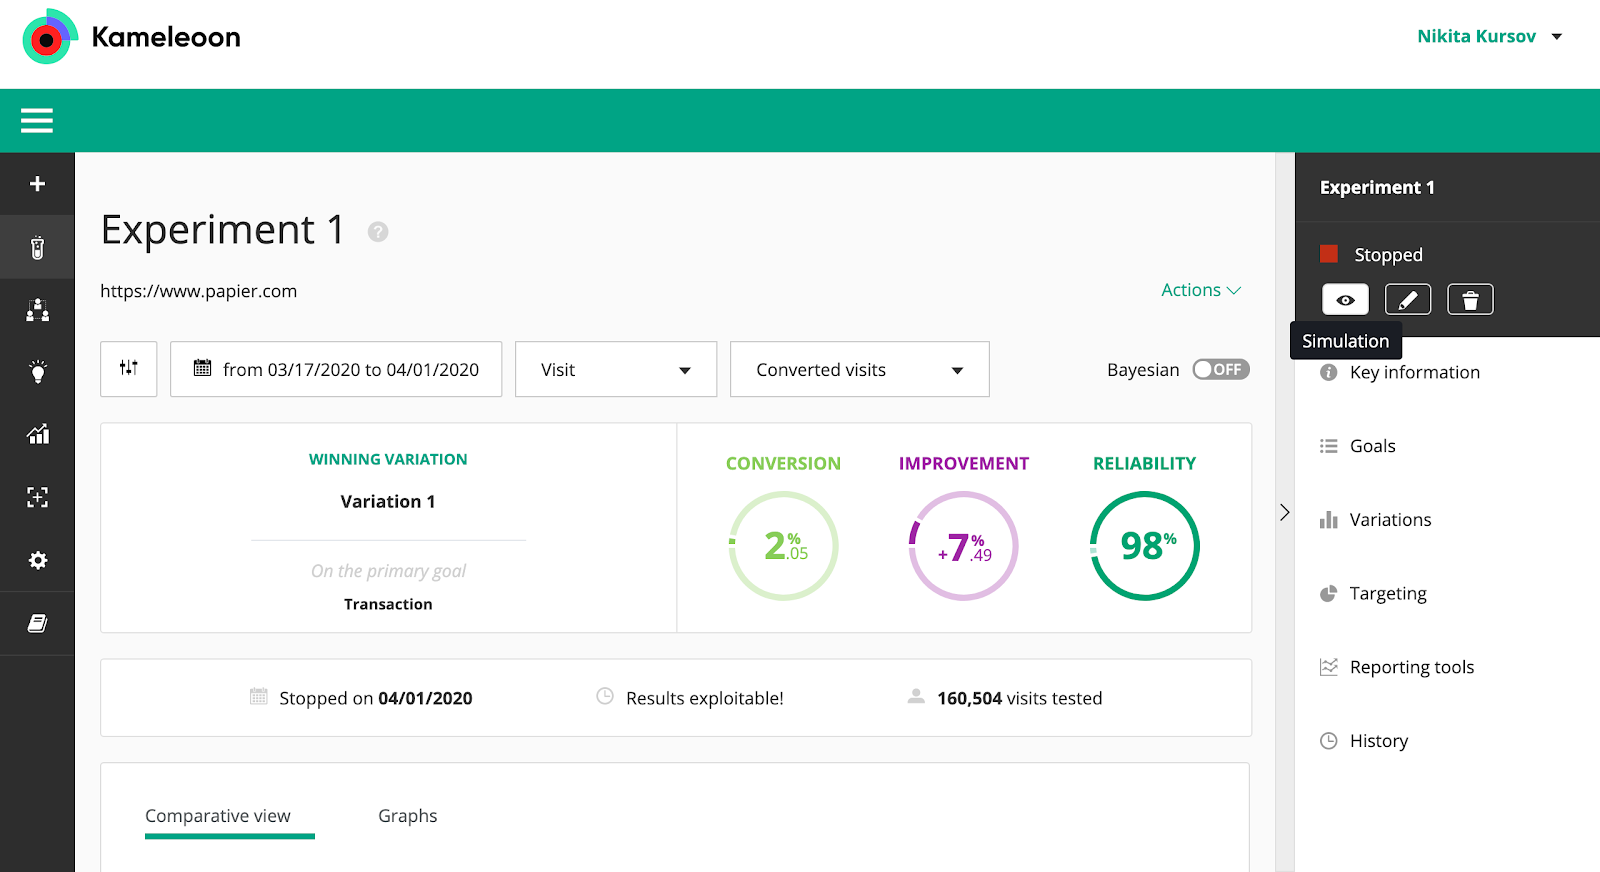
- In the summary block on the right when you click on the results of a test:
Once the simulation is launched, you’ll see your website appear, with the simulation tool at the bottom of the page with 4 tabs: “Experiences”, “Targeting”, “Goals” and “Visits generation”.
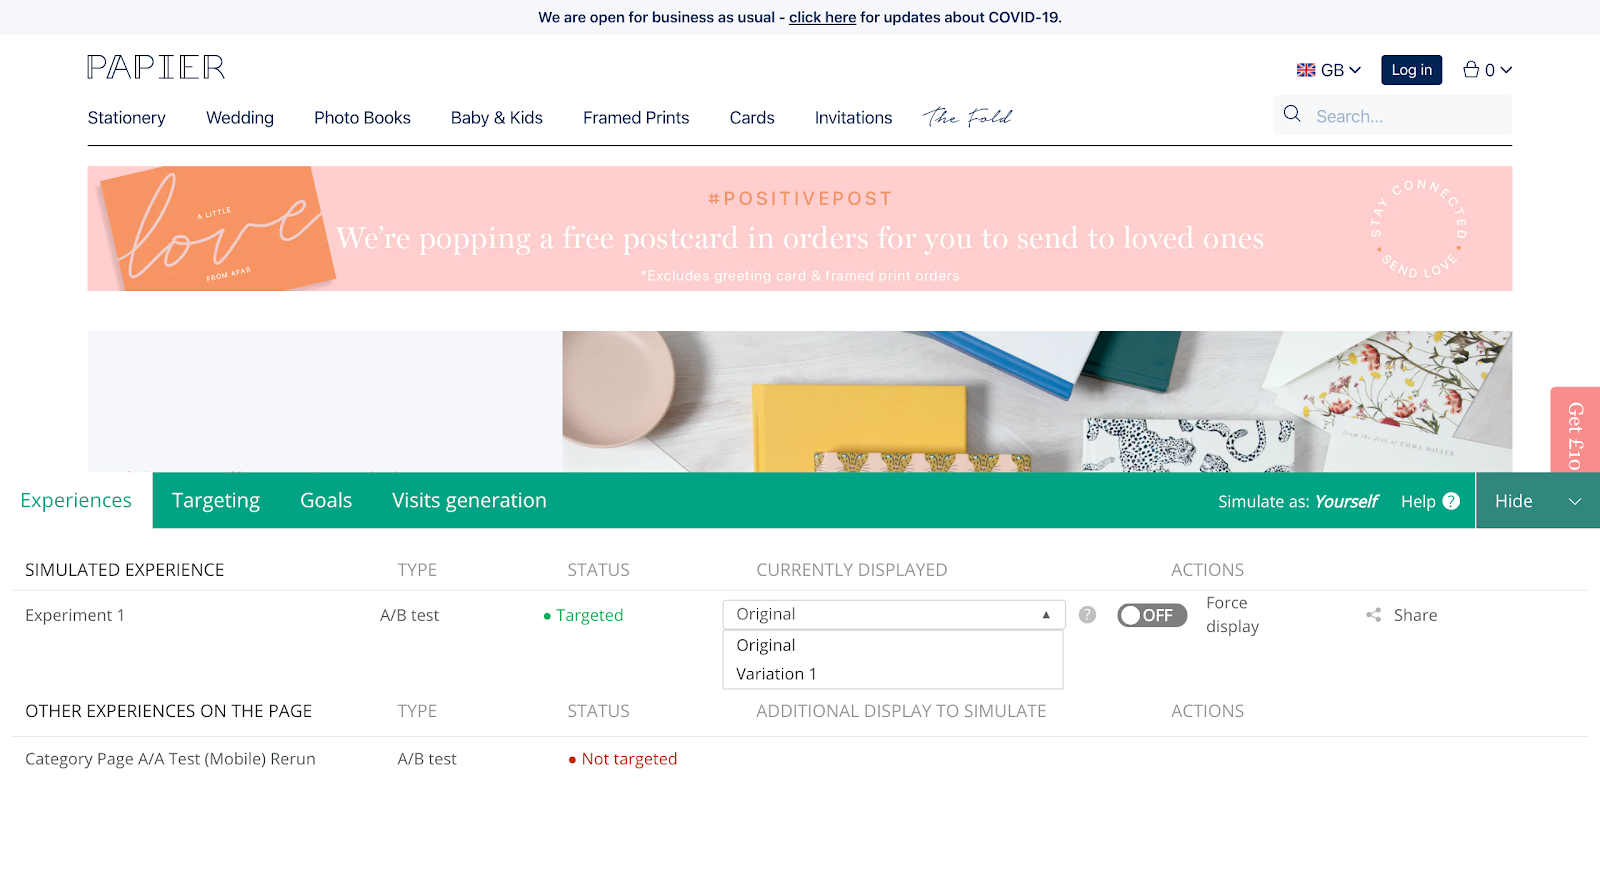
3. Experiences tabs: an overview of your experiences (online and simulated)
This tab gives you an overview of all your experiences: those that are being simulated and those that are online on your website.
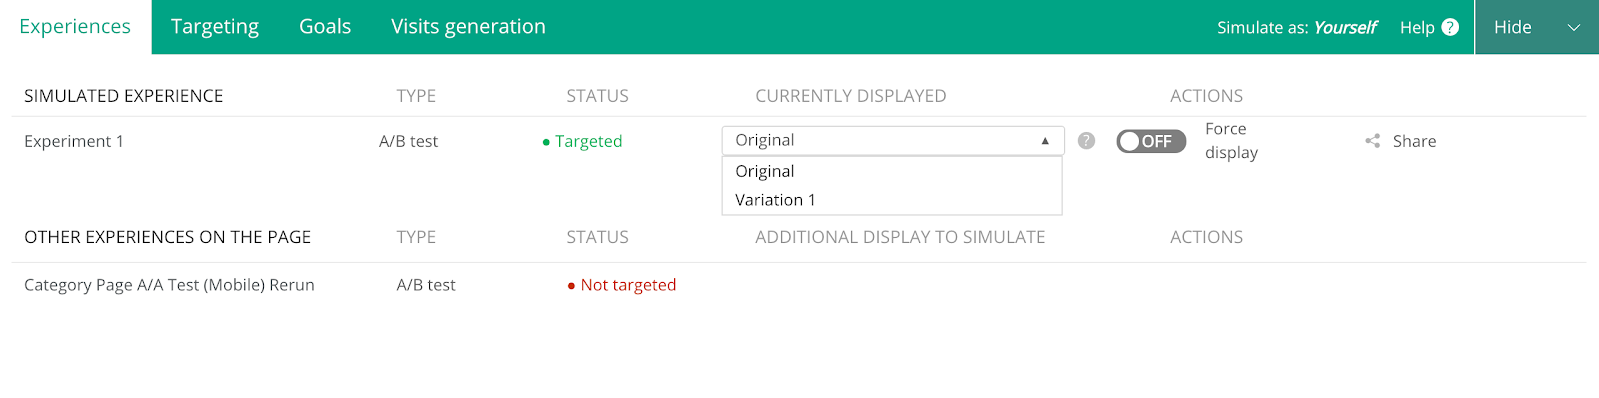
On this page, you can see:
- What type of experiment is ongoing (A/B test or personalization)
- Whether or not the targeting or exposure conditions are correct
- Which experience is displayed in the simulation tool
The last section of the tab, “Actions”, enables you to:
- Force the display of your variation or expose your personalization by clicking on/off.
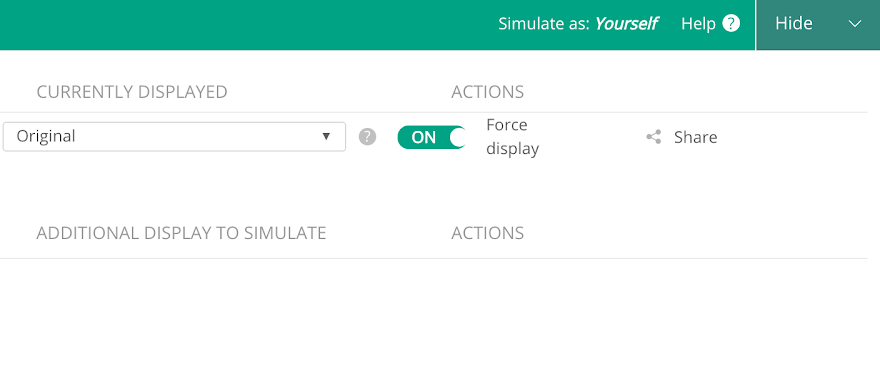
- Share the URL of the simulation with your team by clicking on “Share”. A URL is automatically generated by Kameleoon and remains valid for one hour. Any changes you have made can only be seen by the people who have access to the URL.
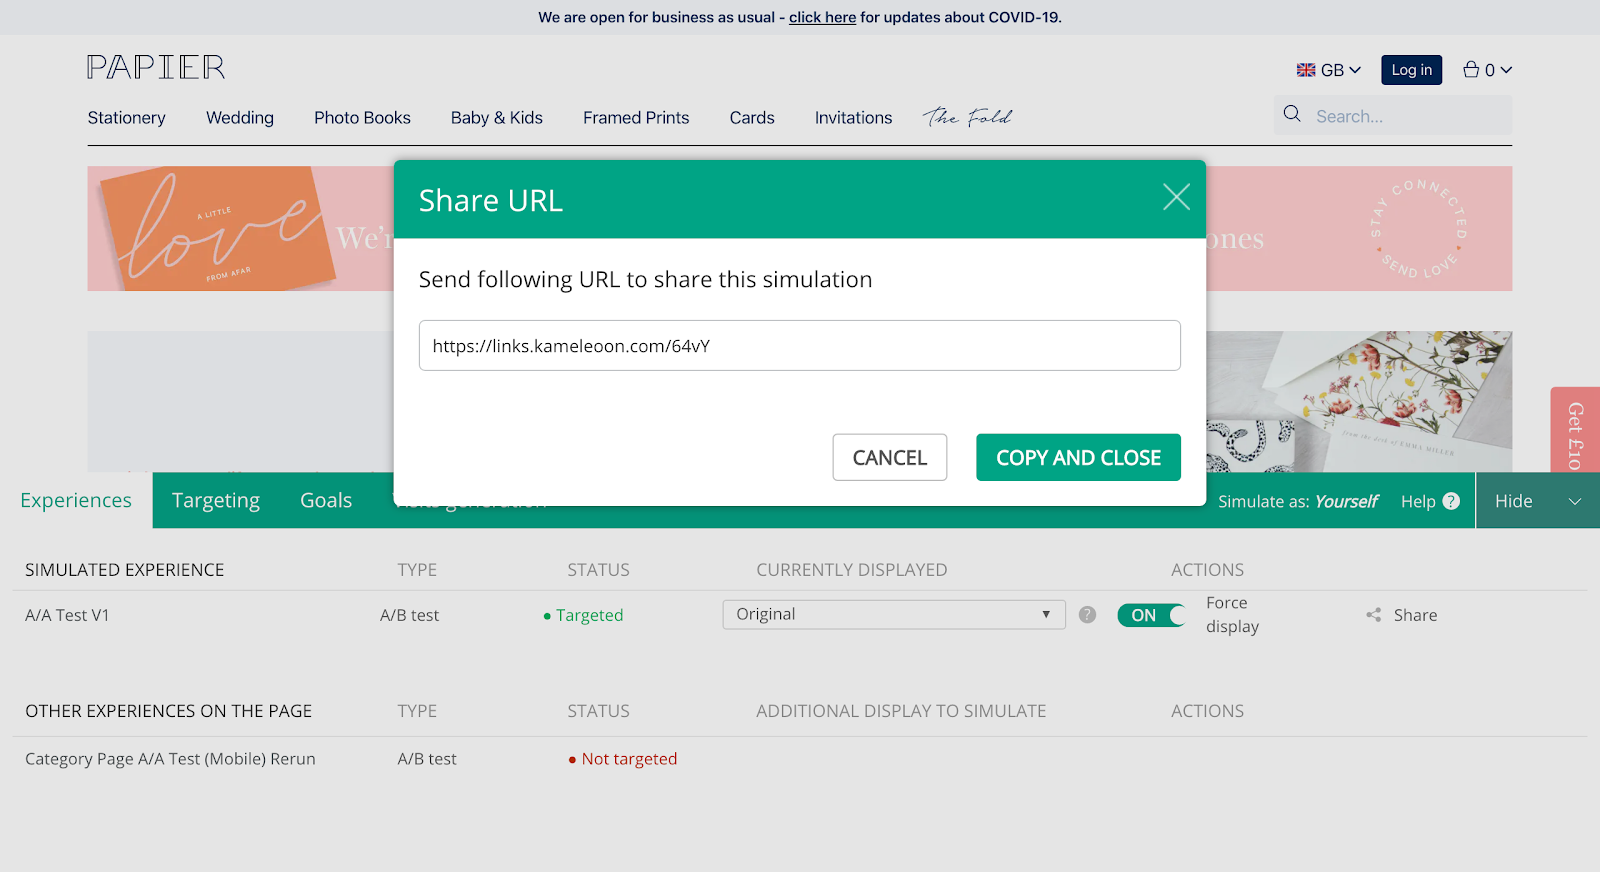
Tip: you can also identify the other experiences that are currently running on your website and, at a glance, see if you are targeted on several experiences at the same time. This is an essential feature to help you prioritize your scenarios in such a way that you don’t overexpose your visitor and you avoid conflicts between two overlapping scenarios. This is even more important when we’re talking about personalization: in addition to the targeted/not targeted status, you can see if you are exposed or not depending on the rules of prioritization, capping and storyboarding in place for this personalization and the others that are currently running on the website.
4. Targeting tab: check the correct configuration of the targeting criteria for your visitors
The goal of all personalizations is to meet the expectations of visitors as closely as possible, which is why you must set targeting conditions.
For example, your personalization campaign can be aimed at visitors who arrive on your website via a search engine and go to a product page.
With the “Targeting” tab, you can check that all the targeting conditions set for your scenario are fulfilled.
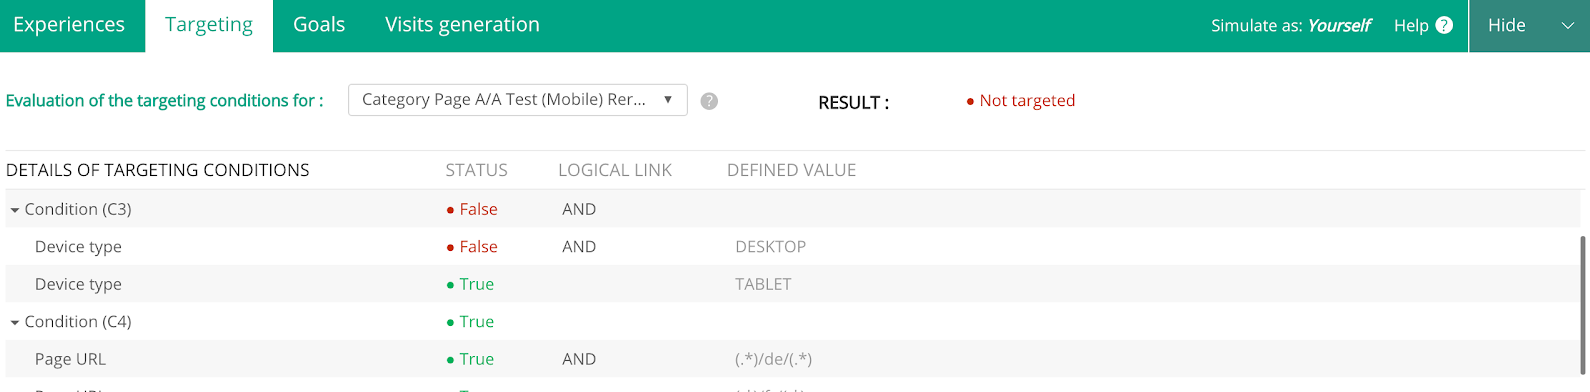 You will also find the full range of the exposure conditions (capping, prioritization and micro-targeting) set for this scenario and can thus acceptance-test that these conditions work. When the conditions are fulfilled, the status of each condition changes from red (false) to green (true). If one of the criteria is not verified (and appears as “false”) you will be able to analyze the causes of this and correct your configuration.
This is a real life-saver when you’re working on personalization scenarios that have more than ten or so conditions, because you can see at a glance the condition(s) that you won’t validate!
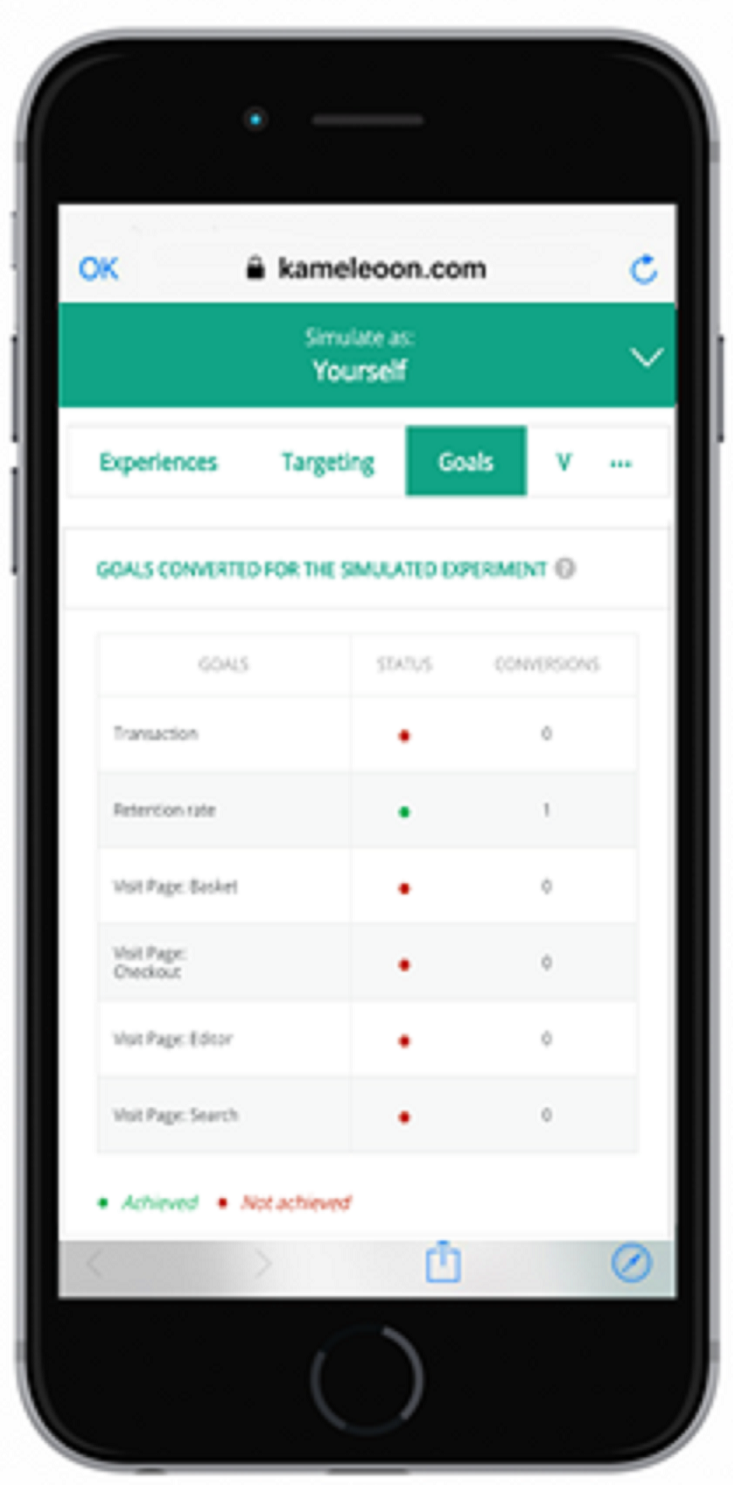
5. Goals tab: check that your goals are correctly configured
When launching an experience, you set goals (KPIs), for example, for visitors to access a product information page or add an item to their cart. The goals tab enables you to check that the goals associated with your campaign are correctly configured. To do this, you can simulate a visitor’s journey and check that the goals are achieved when you take a certain action.
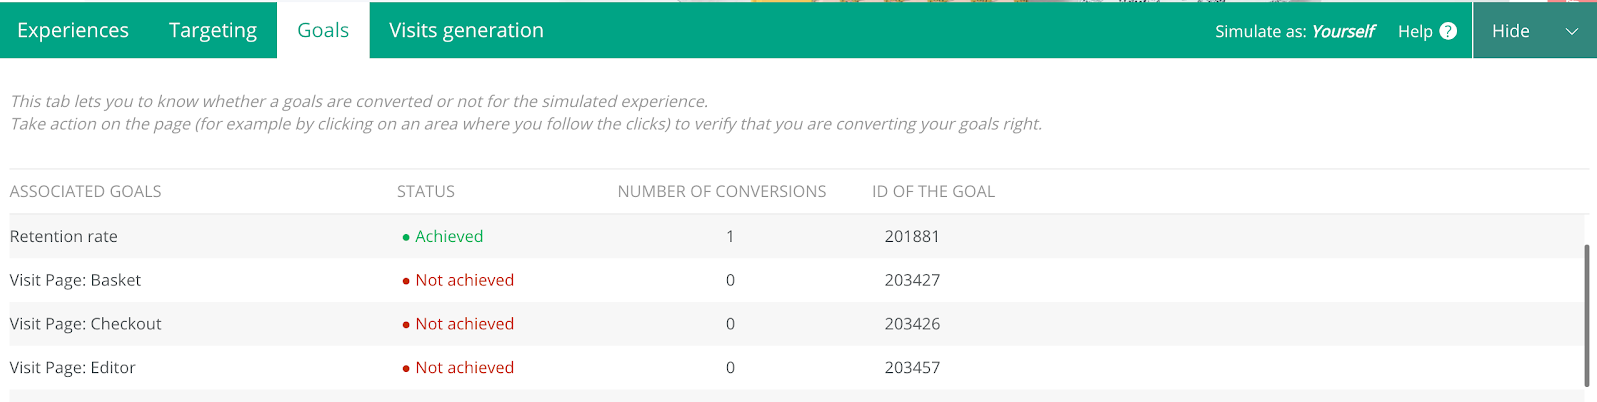
For example, if you simulate the journey of someone who is visiting a product information page and puts an item to their cart, you will be able to note that the “Access product information page” and “Add to cart” goals have correctly registered, since the conversion counter for these goals increases after each of these actions.
6. Visits generation tab: put yourself in the place of different visitor segments
The visits generation tab enables you to simulate a visit by putting yourself in the place of any visitor segment that has been pre-configured on your Kameleoon account. A drop-down menu enables you to select the type of profile that you want to use to simulate the experience.
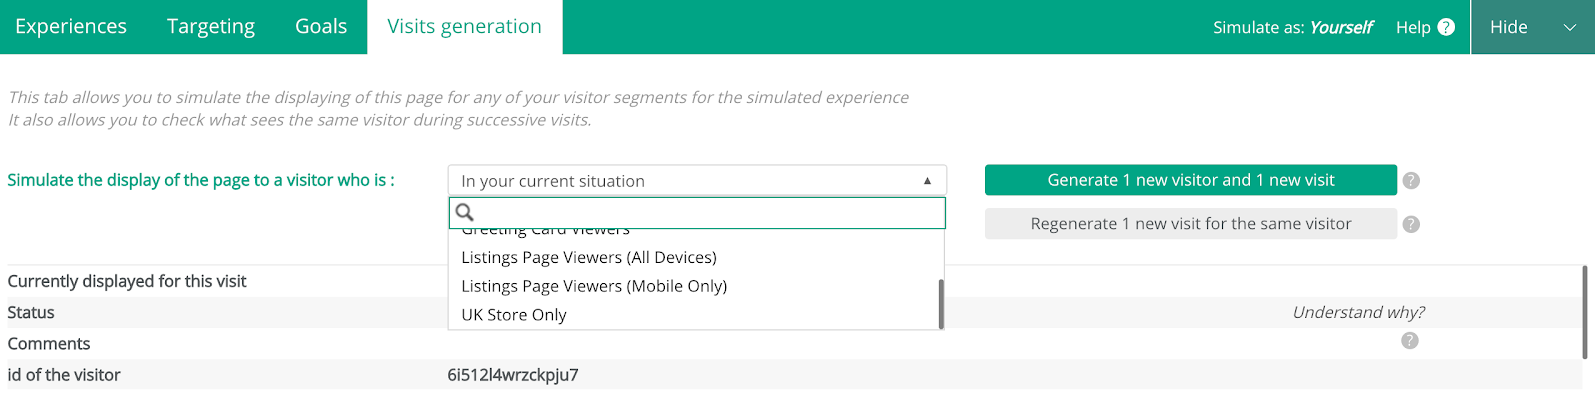 For example, if you want to offer a promotion only to visitors who arrive on your website via an ad, you can simulate their experience upstream as well as that of the other visitors who will not be exposed.
Above all, this essential feature enables you to take a leap forward in time and check that a visitor’s browsing experience will remain relevant in the future. You can also check what a new visitor or a known visitor sees over successive visits.
This can prove useful if your scenario is complex, for example, if a promotion is triggered only after the fourth visit or is reserved for new visitors.
7. Simulate your experiences on all types of devices
Your visitors don’t all use the same device or operating system. A desktop computer can run Windows, Mac OS, Linux, Ubuntu, etc. and the possibilities are just as numerous on mobile.
To this, we can add the size of the device, which can vary enormously. In short, the visit experience on a single page can change radically from one device to another.
So it is important to anticipate what the experience you’re going to offer will look like on all the devices used by your visitors.
For example, what will the experience you offer to a mobile user on an iPhone X look like compared with that of a visitor who connects via the latest Samsung Galaxy, or that of a visitor connecting via their iPad? From one device to another, the layout changes a lot (if your website is responsive, of course) and with the simulation mode, you can generate one link per device to test your experiences before putting them online.
- Always acceptance-test your experience on different device types before putting it online
- Open your acceptance test URL in a private browsing window.
- Make sure you close all the windows you have displaying the same page.
- Only one acceptance test URL can be open at a time.
- Make sure you close the simulation once the acceptance test has been carried out.


